On “It is what it is”

I had a moment to catch up on some things this weekend, and returned a call from a friend of mine at CalArts.  We had a very nice conversation catching up and discussing Higher Education funding, trends, pedagogy and the like and she was kind enough to tell me this:

“You know, in a conversation we had once – you gave me some advice and told me that, ‘it is what it is’.  I thought about that a lot – and about how you’ve brought it up a number of times in our conversations – and it’s something I find myself coming back to as a mantra when I’m facing something difficult.”

She had asked me about where that mindset came from, and I’m sure it’s rooted in growing up in a working class small town in upstate New York.  Compared to many people around me I had it relatively easy.  My parents both worked hard – my dad taught middle school and my mom worked in a factory – and they owned the house we lived in. (A note: Despite a lot of nonsense talk generated in the media earlier in the year, as people living on an educator’s salary, we did not live high on the hog.  We burned wood for fuel (that we cut stacked and dried on our own), did all our own repairs and (for a while) raised animals for food. The two-story house I grew up in with a garage and a 2 story workshop on a 1/2 acre of land sold for well under 40k if that tells you anything about the economics of the region.)

Other people I knew had it really hard.  Farmers (and often their children) who worked from dawn to dusk with spouses working additional odd jobs just to make ends meet.   We had “valley runners” – a term of no endearment reserved for families who would relocate multiple times a year to stay one step ahead of the law.  I’d always see the kids in my classes; they’d show up for a couple of months and then be gone to the next county.  When I’d see them months, or years later, they had always changed for the worse.  They picked up a number of skills they needed to survive when you’re always on the run  (typically manipulation, but sometimes cons or petty theft), that were depressing enough for an adult to have to rely on to get by – much less a child.

Mainly though, I knew a lot of good people who worked hard and were often presented with really difficult situations.  And the response to those situations was to work through it.  I can’t count the number of times that I heard variations of, “No use crying about it – let’s get to work.”

For those of you who resonate with this sentiment, and have never read Marcus Aurelius’ Meditations, it might be worth a moment of your time.  One point Aurelius’ (and other Stoics like Epictetus) bring up repeatedly is the value of seeing things for what they are.  That often means removing the emotional issues associated with the matters at hand and trying to deal with them objectively. (Albert Ellis made an entire career out of this method of inquiry with his REBT (Rational Emotive Behavioral Therapy) approach).

.

Getting emotional about certain things (particularly difficult things) only adds to their difficultly.

.

In my world view, some things are simply facts andviewing those things as such makes it easier to see them for what they are.

.

For example:

2+2=4.

How do you feel about that? (or do you feel anything?)

It’s difficult to get emotionally invested in it because it’s merely a fact.

.

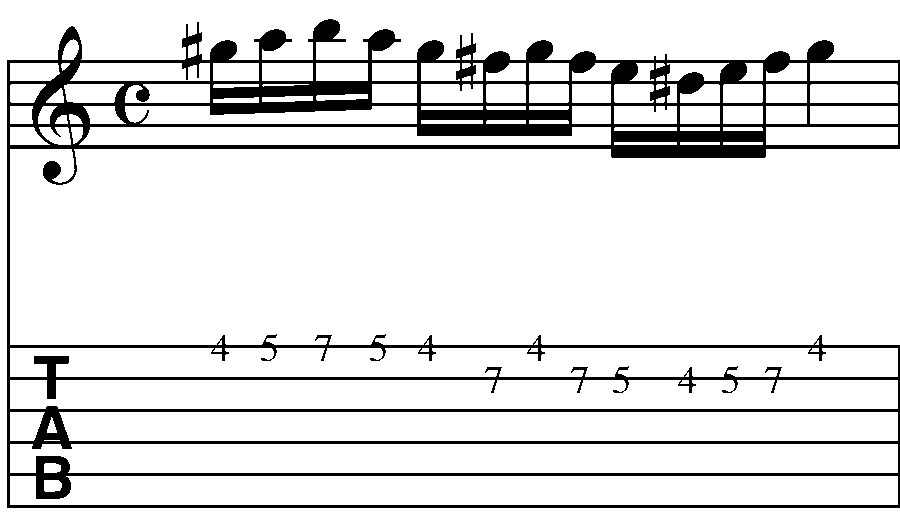
Now here’s the idea applied: where a student might hear, “You’re going to have to put a lot of time in to getting those sweep arpeggios down the way you want.” I hear “2+2=4”.  There’s no emotional involvement  and so there’s less to get tripped up on.

There are a million reasons to procrastinate, and generally only one or two to get something done.  If you’re facing something really daunting there’s a several part process I can share to help make it manageable.

.

Getting it done

.

  1. Know why you need to do what you’re doing. As Viktor Frankl once said, “He who has a why can bear almost any how”.
  2. Deal with problems individually.  Many problems are multi-tiered so break them down into individual components to make them easier to manage.
  3. See the problem for what it is.  Gain a scope of what it is you are trying to do and prioritize what has to happen to complete it.  (For example: If you’re trying to get better at sight-reading – you’re going to have to work on it a lot over a longer period of time.  If you’re trying to get two bars of a solo down – it will probably be a much shorter over-all time investment).
  4. Have milestones and a deadline.  Know what you’re going to complete by when.
  5. Prioritize and address what you can.  Don’t get hung up on big steps here, this stage is all about the specifics of each step (i.e. the grunt work).
  6. Reassess and return.  As milestones are reached verify your progress and start again.

.

I remember reading a David Lee Roth interview where he was talking about how having a drive was the only thing that was going to get you through endless vocal practicing in your bedroom.

There’s nothing glamorous in the work that goes into doing anything well, but it’s necessary to acquire the skills needed to do those things.

.

In other words, it is what it is.

.

Thanks for reading.

-SC

“When You Come To A Fork In The Road Take It”

A number of the motivational posts I’ve posted  here center around a few key concepts:

.

  • Having a clear vision of what you want to do (goals)
  • Aligning perception with reality (having an honest assessment of what needs to happen to reach those goals)
  • Daily work on those goals
  • Limiting distractions, and obstacles in the way

.

The reason I come back to these posts to the extent that I do (and why I address it with myself as much as I can), is because it’s incredibly important to make the most of your time and enjoy it because time is all you’ve got.  All the talent, skill, strength, brains or money in the world won’t stop you from dying eventually.  Since all those things (talent, skill, strength, brains and money ) are acquired over time, in the end all you have is your time and how you’ve used it.

.

Life is short and the only thing of value.  Don’t waste it away.

.

We live in the most technologically advanced era the world the world has ever seen, but despite (and/or because of) that technology we also live increasingly isolated existences.   As a society, we often equate texting with talking and surfing the web to connecting with someone (or something).

.

All we’re really doing is staring at a TV with an infinite number of channels and typing.

.  

There’s only limited interaction and a one way transmission of data.   It’s  addicting, comfortable and seductive and brings about the complacency and relaxation everyone looks for at one time or another.  I’m not saying you shouldn’t relax, but I am saying that being sedentary in anything you do carries it’s own inertia (physical and psychological).  The more you turn off your brain, the more likely you are to turn off your brain – even when you don’t want to.

.

My father’s grandfather worked coal for the railroad every day of his teenage and adult life.  It was long hours of backbreaking labor and by all accounts, he was an incredibly powerful man.  When he retired, he decided that he was going to retire from everything.  He sat in his favorite chair and went from someone who was active and engaged to someone with very minimal physical exertion and no real goals for the future other than not working.  He died a couple of years later. I can’t prove that they’re related, by in my mind they are.  By my dad’s account, he basically just decided to stopped living.

.

“When You Come To A Fork In The Road  – Take It”

.

And this brings me back to meaningful living and navigating the overwhelming number of options available to us.   Indecision is a natural byproduct of being overwhelmed.  While I’m all for making an informed decision before taking action, if you spend too much time informing yourself, you won’t have any inertia to carry out what you initially wanted to do. The unexamined life may not be worth living – but the over-examined isn’t either.

.

In any battle with indecision, at a certain point you have to punt.  If you get overwhelmed with options, pick one and run with it until you have to switch to another.  If you have a good grasp of what it is that you want to do, you’ll make changes in direction as you require to get back on track.

.

It’s less important what thing you do first as long as you do something.

.

Thanks for reading.

.

-SC

Circumnavigating The Wall You Just Hit

It’s easy to get so caught up in the how, or the technical process of what you’re doing, that you forget the why

.

Every once in a while someone will send me a You Tube clip of some wunderkind playing a million notes and I often think, “Wow it’s impressive to spend so much time getting that down.   I wonder how they’re going to use that when they’re playing Brown Eyed Girl at the local bar?”  The answer, of course, is that they’re not going to play that or maybe even any song.  The point of the video generally isn’t to develop something interesting in a larger musical context (like a song) but instead to promote their efforts by performing something technically difficult to get people impressed.

.

I don’t fault players for this, they’re simply trying to make a connection and that’s the point of music in general.  Sometimes that means playing a million notes and sometimes that happens in the silences of the music you’re playing.   It’s an easy path to go down because making a connection is really hard. In addition to a lot of work, it requires experience, sincerity and no small amount of guts to leave yourself exposed.  In contrast, sitting down with a metronome and getting a lick up to a quick tempo is substantially easier and the result is quantifiable.  Even if people aren’t impressed, you’ll know that you got it up to speed and take some comfort in advancing your technical ability.

.

But the flash of something fast will fade quickly, and what’s left is the content of what’s being said and the sincerity behind it.
.

I like video game licks in certain contexts, but they’re probably not going to work on a ballad very well (even if it is a fusion track 😉 ).  If you’re saying a lot of words without much meaning it’s not going to have a lot of impact.

.

I’ve had gigs where everything involving making a connection turns off on the stage and while it’s not a defining moment in human history, for someone who’s being used to being connected to music it’s a pretty awful feeling.  I’d even argue that this was the case for 90% of the gigs I’ve played in LA.  There can be any number of reasons for this.  There might be technical issues that completely pull you out of your mindset.  The audience might not be there to make a connection.  Things may not be jelling with the band.  But most importantly,  it may be your disconnect, and it’s the most important, because it’s the only performance factor that you really have control over.

.

Those of you familiar with the Aesop’s fable regarding the fox and the lion will probably remember the final adage, “Familiarity Breeds Contempt “.  You can put so much time into the same thing on guitar that it loses all musical meaning.  The bad news is it’s probably not going to gain additional meaning on the bandstand.  In all likelihood you’re going to disconnect from it further.

.

The more you work with specific things the easier it is to auto pilot your way through them, and the less likely you’ll be able to connect with it.  Taking that a step further, it’s going to be hard to connect to audiences if you’re disconnected from your own playing.   It’s more common than you might think, and a lot of musicians go through small (or large) periods where they “weren’t feeling it”.  They hit a wall.

.

By it’s nature, any wall is usually made of pretty hard material so meeting it head on and trying going through it is not the best approach.  I can tell you from personal experience that taking the approach of saying, “suck it up” isn’t going to get your groove back.  Playing through it is exactly what you probably shouldn’t be doing because it’s just going to distance you further from the actual music when you play.  It’s like when a relationship is on the rocks and you’re convinced that spending more time together will make it better when the time you spend now is stinted and awkward.  The better approach in both cases is to step back and get some perspective…to go over the wall if you will…

.

One man’s recommendation for dealing with the wall

.

If you’re facing this right now, here are some strategies that may help.

.

  • Acknowledge that you’ve hit a wall.  You can’t fix something you don’t recognize as a problem.
  • Once you acknowledge that you’ve hit a wall, realize that while it might be big and imposing, it’s still only a wall.
  • If the wall you’ve hit is from playing in general, take a break from playing for a couple of days.  Spend that time trying to connect with friends or family.  What you do isn’t really as important as the fact that you’re engaged and connected while you do it.
  • Learn some new songs.  Learn things that are very non guitaristic like vocal melodies or horn lines.  Take those ideas and write something new with them.
  • Go back and listen to music that inspired you.  Try to find out what it was that inspired you about the music.  Don’t over think or over analyze it, just try to connect with it.
  • Get out of your comfort zone.  Listen to music from other cultures.  Read a book by an unfamiliar (but recommended author).  Play with different musicians.  Take a short trip somewhere you’ve never been with a friend and see some new surroundings.  When I was in Phoenix, I checked out the Musical Instrument Museum and had my head turned around in a dozen different directions both by the instruments and the multimedia presentations of field recordings.  I left that place with a lot of new musical ideas buzzing around my head.
  • Practice playing in front of other people.  Learn a new song and play it at an open mic.  Make notes of when you’re connecting and when other people are connecting and make mental notes of how they’re doing it.
  • When you come back to practicing, take a measured breath before you begin playing.  Mark the fact that you’re about to start something to get into the zone.
  • Try being mindful of what you’re practicing.  Set limits on time and only practice one thing as long as you can be engaged in practicing it.
  • When you play a solo – try only playing what you can sing.

 .

There are a lot of other things you can try, but the real goal here is to get re-engaged and bring that to your playing.  As corny as it may sound, playing is an expression of who you are and where you’ve been.  If you don’t have anything to say in your playing, it may be time to live a little more so you’ll have a story to tell next time you sit down…For me, it was about realizing what was wrong, taking ownership of that and moving past it to get back to making music instead of just sound again.

  .

Good luck to you and thanks for reading!

-SC

.


FnH Interview Online and other Guest Blogging

Hey all – a couple of brief news things:

.

1.  My interview with FNH Guitars is now live on Live4Guitar, a very cool guitar blog with a paid lesson service as well.  I’m going to be posting some lessons and additional content there fairly regularly, so check back here or at Live4Guitar.

.

2.  I’ve also taken on a new weekly column for Guitar-Muse.com, that will be a 10 questions with various builders, players and tech people.  I’m in the process of lining some cool people up – but wanted to get your feedback as well.  The first person on the block is Jonathan Wilson who’s doing incredible work making bowed guitars in SoCal (check out some of the awesomeness on the Togaman GuitarViol site).  Update: This interview is now online, you can read all about it here.

.

I’ve also got interviews with FnH Guitars, Jack Sanders and a couple of other people lined up.  But I’m interested to see who you dear readers, would like to read about.  If you could take a second to just put a name or a company name in the survey, it would be very helpful.

Click here to put your request in

.

Thanks for reading!

-SC

Putting The Trio In Rough Hewn Trio Or Some Upcoming Shows

We’ve booked a couple of shows around Chris’ summer tour with Martin Fabricius and Craig’s ongoing tour of regional correctional facilities.

.

In chronological order:

.

  • Saturday, April 30 · 2:00pm – 3:00pm UC Irvine, Claire Trevor School of the Arts, Winifred Smith Hall – 4002 Mesa Road – Irvine, CA – iPhone Not Required (but bring’m if you got’m) i.e. Lavender’s Grad Recital
  • Friday, May 27 – Tribal Café – 1651 West Temple Street Los Angeles, CA 90026-5026 (213) 483-4458
    Yes Memorial Day Weekend.  No – we’re not sure who’s going to be in town to be there. Yes it will be awesome. Starts at 7:30 – bands TBA
  • Friday, July 15th – Tribal Café (Do you see a trend here) Starts at 7:30 – bands TBA

Here’s the info for the Irvine show from Chris.  This is going to be a really cool recital that will feature audience members playing with the band using Chris’ Thumbafon iphone ap.

.

iPhone Not Required (but bring’m if you got’m)

.

Saturday, April 30 · 2:00pm – 3:00pm

UC Irvine, Claire Trevor School of the Arts, Winifred Smith Hall

4002 Mesa Road

Irvine, CA

This is the penultimate performance of my graduate work, which is centered around the investigation of using mobile devices as a means toward audience collaborated performance. It’s an epic social/musical experiment* that YOU WON’T WANT TO MISS!

Performance starts at 2pm.

Checkout www.thumbafon.com for information on the iPhone App which will be used during the performance.

Featuring the Rough Hewn Trio”

Finally if you want to get a sense of the mellower side of our ensemble:

..

.

Getting hipness from a major triad or more chord recycling part 3

In part one of this post, I looked at generating different major chord variations based on flatting the root and the 5th.  In part 2, I sharped those pitches and then combined the two approaches to create additional chords and textures.  In this post, I’m going to look at applying these chord tones to  melodic (or lead) ideas.  But first…

.

The Relative Minor Explanation:

The second post of this series ended on a cliffhanger when I said that all of the A major upper extensions would work as substitutions for F# minor chords.   You can read the rest of this Relative Minor explanation if you want to understand why this works – otherwise you can just skip ahead to the next section for some melodic ideas.

Here’s the explanation for this.

In a major chord, the 4th is sometimes known as an avoid note.  In the key of C, this means that the note F is usually viewed as a note to avoid either melodically or harmonically.  If we look at a major scale:

C D E F G A B C

the only 1/2 steps in the scale are between E/F and B/C.

Chromatics are powerful things in music.  They tend to act as tonal anchors to where the tonal center is.  If you play a simple ascending C major scale and stop on the note B, most listeners will want you to resolve to C.   In the major scale the 1/2 step between the 3rd and 4th makes the ear think that F major is the tonal center.

(For those of you familiar with ear training, if you sing a c major scale from C to F – it sounds like you’re singing so la ti Do – instead of Do re me fa.)

One innovation that came about in jazz music was to substitute an #4 for a 4 over chords with a major quality.  This put the 1/2 step motion between the 4th and the 5th.  Since the 5th is a chord tone in a major triad, it has less of an effect of moving outside of the key.

Here’s how this is applied:

  • Any Major scale with a #4 is a Lydian mode.
  • The A Lydian mode is taken from the parent Major scale of E Major.
  • The Relative Minor chord of A Major is F# minor.
  • In the key of E Major, F# is the second scale degree and uses the Dorian mode.
  • Dorian is a popular mode for soloing over minor chords.

Here’s the shortcut:

You can change the chord scale with the chord if you want here – but if you’re playing a chord progression that goes between a major and the relative minor chord (and you’re using Lydian for the major chord) – you can keep using the same scale to create a Dorian sound over the minor chord

(and vice-versa).

A Quick Review

Here’s the Major chord shape I’ve been modifying over the first 2 lessons:


.

A Major

.

If the root and the 5th are strategically sharped or flatted, other chord tones (7, #11, 9 and 13 can be created).

.

A major with  additional chord tones on the B and E string

Since the b (9th) on the high E string is available, the 9th on the g string is something that can be incorporated as well.

.

A Lydian/F# Dorian Chord tones based on an A major chord shape

.

If I’m soloing over A major (or F# Minor)  – all of these notes are fair game. 

Try all the licks below over an A major type chord or F# minor type chord.

.

Lick 1 (Double Click any notation to see full size)

Lick 1


I try to stay with consistent note-per-string fingerings on strings when playing melodically, so here I’m going to take the same idea and just move the last note to the g string to create a 3 note per string pattern.

.

Lick 1: Three note-per-string shape

.

Here’s how it sounds at 1/2 speed.

Here’s how it sounds at tempo.

.

Lick 2:

Here, I’m taking the same notes and breaking them up intervallically into 4ths (except for the 5th in the last 2 notes which adds some variety in the cycle).  Licks like these are easy to visualize (and therefore easy to manipulate when improvising).

.

Here’s how it sounds at tempo. 

Note:

When I improvised this- I played it as transcribed – but when I recorded it – I played the last 2 notes as 1/8th notes instead – please take any of the ideas here and manipulate them as you see fit.

.

Here’s a similar (but shorter) idea with a scalar pattern at the end.

.

4ths lick 2

.

Here’s how it sounds at 1/2 speed.

Here’s how it sounds at tempo.

Lick 3:

Here’s an arpeggio idea that incorporates chromaticism.

.

arpeggio lick w. chromatics

.

Here’s how it sounds at 1/2 speed and then at tempo.

.

A couple of notes:

  • In the beginning I’m visualizing a C# min7 arpeggio (C#, E, G#, B) starting on the B.
  • The chromatic motion isn’t random – instead it specifically emphasizes the A and the C# in the A Major chord.
  • In the 3rds pattern that ends the lick – I’m skipping the middle note of the 3 note per string pattern in Lick 1.  I like using 3rds in patterns because it breaks up the monotony of just running scales up and down.


Going Further – Dominant Superimposition:

Now that some initial options have been explored – I’ll take a look at the upper notes of the voicing.  If I take the previous fretboard diagram and extend a note on the g string I’ll have something that looks like the diagram below:

Here’s a chord voicing I discussed in part 2 of this series (B7/A)

And here’s how it sounds.

Short cut 1:

Playing a dominant 7th chord on the second scale degree of a major chord will get you all of the upper extensions and the root)

(i.e. B7 over A major)

Short cut 2:

When soloing over a major chord – you can play a dominant arpeggio on the second scale degree (i.e. B7 over A major).

In the example below, I’m combining a B9 arpeggio and an A major arpeggio to create a melodic idea.  The A and C# on the D string are the linking material between the 2 arpeggios (they act as the 7 and 9 in the B9 chord, or as the root and 3rd of the A Major).

The important thing with any superimposition like this is to resolve it to a chord tone in the chord you’re soloing over (in this case A).

.

.

Here’s how it sounds at 1/2 speed.

Here’s how it sounds at tempo.

.


Going Further – Minor Superimposition:

Here’s another chord voicing I discussed in part 2 of this series (G# min7/A)

Short cut 1:

Playing a minor chord on the seventh scale degree of a major chord will get you upper extensions (7, 9, #11 and 13)  of the chord.

(i.e. G# min7 played over A major)

Short cut 2:

When soloing over a major chord – you can play a minor arpeggio on the second scale degree (i.e. G# min7/A).

In the example below, I’m combining a sextuplet idea from the earlier licks and a  G#min arpeggio to create a melodic idea. Again, an important thing with any superimposition like this is to resolve it to a chord tone in the chord you’re soloing over (in this case A).

I’m not a fan of the shift from E to D# in this fingering as it requires quickly barring to get the rest of the arpeggio.  As an alternate fingering, I  recommend this:

.

The “picking” is just a suggestion.  (For example: you could also pull off the D# to the B on the g string and then just continue the sweep picking motion.)

.

Here’s how it sounds at 1/2 speed.

Here’s how it sounds at tempo.

.

Wrapping it up:

This is really only the beginning of where these approaches can go.  Hopefully this will give you some ideas to explore both in comping and soloing.  If there’s enough interest, I’ll expand this approach to minor and dominant chords in future posts.

Final Tech Note:

For those of you who are interested, these are the approximate settings I’m using in Pod farm for the distorted tone here:

Thanks for reading!

-SC

A Game Changer? The Sonuus i2M musicport overview

I haven’t done a gear review in a while – so I thought I’d bring something exciting to the table this time.

.

Lately, I’ve been thinking more about Midi guitar.  Not in the traditional sense of, “wouldn’t it be great to get some flute sounds out of my guitar for this smooth jazz solo?” but using it in (potentially) some more subversive ways.

.

Midi conversion as an improvisation tool:

The first thought that occurred to me was midi guitar is a glitchy proposition to begin with. Even optimizing everything (picking technique, muting, pick choice, tracking parameters, etc) – there was still a lot that could go “wrong”.  This excited me from an improvisational standpoint because it meant that I could have other notes spit out at me that I didn’t play – and that I’d have to actually improvise with what was happening there.  To me, this is much more in the spirit of improvising that playing the same 40 licks I’ve worked out over Stella by Starlight.

.

Midi conversion as a texture:

Additionally, the glitch effect can work really well in sound scape ideas where I might be generating different sounds over (and within) a loop.  That’s appealing to me as well.

.

Midi conversion as a transcriber:

The real interest for this idea though came up with the dvd instructional material that I wanted to generate.  After seeing clips of John McLaughlin’s instructional dvd and realizing that he was simply using a midi guitar to capture audio and midi data in Logic.  By doing this – he would have a rough transcription of what he was playing and then be able to tweak it to make it more accurate from there.  A really good idea and one that stuck with me.

But midi always struck me as a lark.  The pickups and converters meant that I was looking at $500-$600 minimum for something that really wasn’t necessary.  Then I started seeing the ads for…

.

The Sonuus i2M musicport:

If you’ve picked up a guitar magazine or been anywhere guitar related on the internet – you have undoubtably seen an ad for one of the Sonuus Midi Converters.  Their newest converter the i2M musicport, is a small (read: tiny) monophonic midi converter and a 16bit 48k digital audio interface.  Listing for $199 (and selling for $149) this is one of the most intriguing products on the market to me right now.

The unit has a ¼ inch jack on one side and a USB connection on the other which makes it about the size of an adult thumb.  It’s bus powered by the USB – so there’s no additional power supply (the green lit SONUUS logo is a nice design touch as well as the key clip.

It’s impossible for me to image a smaller device but how does it sound?  Since the i2M acts as an audio interface and an audio midi converter – I’ll address this question in two parts.

.

Audio:

The ¼ inch jack is actually a high impedance (hi-Z) input preamp with a 16 bit/44.1 or 48k conversion rate.  Even though I typically like higher audio specs when using my guitar the sound is remarkably transparent and I had no issues with quality.  In fact, this is an ideal interface for practicing or jotting down ideas and would even consider trying it out on a gig if I needed to.  It should also be noted that while I’ve only tested it with a guitar it can be used with bass guitar or other line level sources (like a microphone).  There should be no real issue in using a 7 or 8 string guitar with it either.

.

Midi:

First: I should state that this unit is a midi converter.  It doesn’t have any midi sounds on its own so you’ll need appropriate software (any software with a midi sampler or synth  will probably do) to hear and record midi.

Secondly: The midi conversion is monophonic.  Anything involving chords or multiple held notes will produce unpredictable results.

Having said that, the i2M does monophonic conversion remarkably well.  Tracking was fast, smooth and had very low latency with stock settings (particularly on the higher strings).  If you go to the sonuus website, you can download the Desktop Editor software which will allow you to adjust midi settings to suit your style as well.

Rather than just list them, I’d recommend that you go to the Sonuus web site where you can get full specs.

In use:

I decided to see if I could use the i2M as both an audio interface and a midi converter to see if I could use the score function in Logic to transcribe what I was playing.

The i2M is class-compliant which means that it’s plug and play.  I opened up Logic and had no problem setting it up as a default audio and midi input.  To create a real world example of what it sounds like it when you plug-in and play – nothing was optimized.  The audio is generated from a FnH Ultrasonic guitar plugging into the i2M at 48k.  No amp sims were used in Logic.  The guitar track only has LA convolver, some speaker IRs and a reverb on the channel. The midi is generated from the EXS 24 (using the Garageband/Logic Yamaha Piano).

All Logic and i2M settings are stock.  I heard the piano sound and decided to improvise in a Cecil Taylor style where caution was just thrown to the wind and I approached ideas as melodic flourishes.  I wanted to throw the unit some curve balls so I tried sweep picking, alternate picking and tapping various ideas to see how it reacted.

This video below is just a screen shot of the score pages with an mp3 of both channels so you can compare the difference between the audio and the midi tracking. (You’ll probably want to see it at full screen size – FYI).

.

Here’s what impressed me:

The tracking was pretty clean.  There were a few random glitches on the midi score  but those could be easily fixed.  For the most part, I got a rough sketch of what I was playing while I was playing it.  Very cool.

There are certain open strings ringing and other string noses that were ignored.  This was surprising and cool.

The audio signal sounded pretty good out of the box – but to be 100% fair – this was with a clean sound.   I  ran this through POD Farm to see how the distorted tones were – but  for me, the resolution and bit depth weren’t there for a satisfying dirty tone.  In other words, as an audio converter – this isn’t going to replace my Apogee Duet – but this is really nit picking as the unit is, first and foremost, a midi converter so the fact that it processes any audio is just as bonus.  Additionally, comparing a $150 multifunction unit to a $500 specialized audio interface isn’t a fair comparison.   That being said, the i2M has a reasonable starting point for a clean tone.

.

Also while the unit is plug and play as an audio device for Logic and Garage band, AU lab didn’t recognize it.  Not a deal breaker and something I need to research further but it may be something to look into depending on what platform you plan on using.

This unit is just a lot of fun.  I probably spent 2 hours just playing the various logic EXS patches.  Additionally the piano/guitar sound gave me a lot of compositional ideas in a Maria João idea – which is always a good thing.  I tried it with Absynth as well and it worked seamlessly (it even kept tracking as I took liberal swipes at my tremolo arm).

.

In my opinion this unit is a game changer for guitarists (and hopefully for a lot of other instruments as well).  To have something that works this well at this price point while putting an audio interface and a midi converter well within most gear budgets.  For this demonstration, I’m essentially using it as a toy, but the potential applications for this are exciting.

Whether you’re looking to lightly tread the waters of midi guitar, get in deep for sonic mangling or just need a decent pocket audio interface, you’re hard pressed to do better than the i2M.

Thanks for reading!

-SC

Getting Hipness From A Major Triad Or More Chord Recycling Part 2

In part one of this post, I looked at generating different major chord variations based on flatting the root and the 5th.  In this post, I’m looking at sharping those pitches and combining the two for additional textures (if you came here directly – you may want to review the A major variations in  part one before continuing).

.

Start with a map:

Adapting chord forms requires the ability to visualize chord tones around the shape you’re using.  As a starting point, here’s a fretboard diagram of an A major chord (with the A being on the 7th fret of the D string).  I’ve added some additional chordal extensions on the E and B strings (but this process could be applied to any string-set).

In the last lesson, I looked at creating sounds with the 6th (or 13 – see post 1 for the difference between the 2) on the E string.  This time, I’ll add the 6th (6th or 13th) on the B string by raising the E  up to F#.

.

A Major 6th no 5th

Here is the sound of the A Major 6th (no 5th) chord.

.

Comparing this to the A major 6th voicing in part 1:

.

A Major 6 - Watch the 1st finger stretch - if it hurts - stop Immediately!!

Here’s an mp3 of this chord.

.

The new voicing is certainly easier.  If I was really stuck on the close voicing of the E and the F# in the A major 6th, I could simply move the F# to the B string and move the E to the open string like this:

A maj 6 with open E string

.

Several Notes:

  • This voicing wasn’t included in the first lesson as I wanted to show the process of how to derive these chords.
  • The upside to this approach is it makes this specific voicing easier to play – but the downside is it’s not movable – which may or may not be problematic for you.
  • If a chord is really difficult to finger – there is always an easier way.  You may not get the specific notes or voicings you’re looking for – but there’s always an easier way.

Now I’ll extend the initial Major 6th sound by flatting the 7th.  This is done by lowering the A to G#.

.

A Maj 7 add 13 no 5th

Here’s how it sounds.

Again,  I’m a sucker for chords with seconds in the voicing (in this case the F# and G#).  It adds a little but of tension and elevates the chord a bit.

.

Adding in the 9th:

First let’s create an A major add 9 chord.

.

A add 9

Here’s how it sounds.

.

Note:

The reason this is an add 9 chord and not a major 9 chord is the lack of a 7th.

Since the chord is a major chord with a 9th added, it’s called an add 9.

.

Now I’ll add a sharp #11.  This is done by lowering the E to D#.

.

A maj 9 sharp 11 no 7th no 5th

Here’s how it sounds.

.

Another Note:


The further you extend the harmony and remove initial chord tones, the more vague the sound of the chord is as related to the tonic.

For example:  The chord above could be analyzed as an A major 9 # 11 with no 7th and no 5th. But the notes are A,  C#, D# and B.  If those tones are centered around B – you have a B, D#, A and C# or a B dominant 9 (no 5th)/A.

If you have to analyze a chord with more than 1 elimination (i.e. “no 7th no 5th”) there’s probably a simpler analysis of the chord.


Going Further:

Now that some initial options have been explored – I’ll take a look at the upper notes of the voicing.  If I take the previous fretboard diagram and extend a note on the G string I’ll have something that looks like the diagram below (again the A listed below is on the 7th fret of the D string):

If I’m willing to be a little adventurous and replace the 3rd of the chord (C#) with the #11 (D#) , I’ll get a voicing with a root and then all upper tensions (9, #11 and 13).  Here it is notated:

.

B7/A

And here’s how it sounds.

.

While you could analyse this related to the key of A Major (A major 13, #11, no 3rd, no 5th, no 7th) you may have noticed that shape is the upper chord voicing for a VII position B 7 barre chord.

.

Short cut 1:

Playing a dominant 7th chord on the second scale degree of a major chord will get you all of the upper extensions and the root).

(i.e. B7 over A major)

But isn’t a stable sound on its own.  If you play this chord and then the standard A major, it will probably feel resolved to you when you play the A.  If you have a song with a number of bars of A major – switching between these two chords is a nice way to generate a little harmonic motion.

Now, I’ll take this idea a little further by lowering the A to a G#:

G# min 7/A

.

Here’s how it sounds.

.

This gives the chord a 7 (G#), 9 (B), #11 (D#) and 13 (F#) – or all of the upper chord tones.

Short cut 2:

Playing a minor 7th chord on the seventh scale degree of a major chord will get you all of the upper extensions of the chord.

(i.e. G# minor 7 over A major)

Like the B7/A, this isn’t a stable sound on its own.  If you play this chord and then the standard A major, it will probably feel resolved to you when you play the A.

.

Quartal for your thoughts?

Here’s one last transformation for now.  Here I’m going to lower the D# to C# to create a quartal chord.

.

Quartal Chord

And here’s how it sounds:

.

A quartal chord is a chord that is built on 4ths (G#, C#, F#, B) as opposed to being built on 3rds like A Major (A, C#, E).  To me, quartal voicings have a nice “airy” or “floating” quality .  This is just one of many  possible quartal voicings built from A major.  Quartal voicings will be discussed more in-depth in a future post.

.

How to double the number of chords that have been covered.

So far, I’ve looked at a series of chords that either work as substitutions and/or extensions for major chords  I’m going to go into more depth about why this works in the next post but for right now – here’s a quick tip that gives a whole other dimension to using these chords.

.

Every chord presented here also works over the relative minor (i.e. F# minor chord).

.

Try taking this chord:

.

and after you play it add an F# by tapping a fret hand finger on the 2nd fret F# on the low E string for a very hip F# min 9 extension.

.

F# min 9 add 13 no 11

.

Hopefully this has given you some new chordal ideas!!  You may want to go back to the first post and apply this idea by playing through all of the voicings covered there and adding the F# as a root.

In addition to explaining this approach more in-depth, in part 3 of these posts I’m going to explore a number of ways to use these ideas in your soloing.

Thanks for reading!!  Please feel free to post any questions you might have.

-SC

Getting Hipness From A Major Triad Or More Chord Recycling Part 1

When I was at Berklee, one thing that took a while for me to really get my ear around was upper chord tones (7ths, 9ths, 11ths and 13ths).  Growing  up listening to a great deal of rock music – basic triads sounded “right” to me.   I learned a lot of esoteric chord voicings to try to expand on those forms – but my ear wasn’t ready for it and so I had no real motivation to develop it at the time.

As I mentioned in the getting through the gig and the recycling chords posts, simple triadic forms can be manipulated in a way that allows players to get more complex harmonic textures in real-time.  Additionally, these approaches can be adapted to lead playing as well.  This short series of posts are going to go deeper into adapting one specific chord voicing.  As a starting point I’ll use the major triad.

The following examples are based around a 5th position A major chord played on the D, G, B, and E strings.


The reason I’m using this specific voicing is to allow the open A string to ring while playing the chord to help reinforce the root.  Here’s the basic rhythm of the chordal examples:

While notated this way for simplicity, all the examples are played with a slight arpeggiation to help accent the different notes.

.

Here’s an mp3 of an A Major Triad.

 .

Rooting around for extra tones:

The first way to generate some additional substitutions for a simple major chord  is to lower the root chromatically.

While there is a root on both the D and the high E string, for now these examples will focus on manipulating the root on the high E string.

Lowering the root of a major triad a 1/2 step (1 fret) produces a Major 7th chord:

(This can be used in place of any A major triad)

A Major 7 Chord

 .

Here’s an mp3 of this A Major 7 chord.

.

Lowering the root of a major triad a step (2 frets) produces a Dominant 7th chord:

(This can sometimes be used in place of an A major triad

Example: When the A acts as a V chord in a chord progression (A -> D becomes A7–>D))

A7 Chord

.

Here’s an mp3 of this A 7 chord.

.

Note:

While dominant 7th chords contain a major triad in them – they are their own unique animal.  A future post will go into generating dominant chords – in depth – but this voicing is presented here as part of the process of generating chords by altering the root.

.

Lowering the root of a major triad a step  and a 1/2 (3 frets) produces a Major 6th chord:

(Typically this can be used in place of any A major triad)

A Major 6 - Watch the 1st finger stretch - if it hurts - stop Immediately!!

.

Here’s an mp3 of this A Major 6th chord.

.

Another Note:

There are certainly easier ways to generate this chord – but any chord form with  a 1/2 or whole step between notes on the B and E strings will require some limber hands.  Again, this voicing is not the only possible voicing of this chord but instead is just one possibility.

.

6th chord/13th chord Tip:

Frequently, I’m asked about the difference between a 6th chord and a 13th chord.  Since the note is the same for both the 6th and the 13th, the terms are sometimes used interchangably – but the difference is based around whether the chord has a 7th in it.  In the example above, the F# acts as a 6th, because no 7th is present in the chord.  If a seventh was in the chord, the F# would be viewed as a 13th.

.

The #4/#11:

One hip tone to use in a Major based chord is the #4 (or #11).  This is generated by flatting the 5th a 1/2 step (1 fret).

A Major add #4

.

Here’s an mp3 of this A Major add #4 chord.

I like voicings like this where the top voices (C#, D# and E in this case) are all close voiced (i.e. in the same octave). The technique of combining these close voiced ideas with open strings is a favorite approach of mine.

This idea can be expanded on by flatting the root as well.

This produces an A major 7 add #11 (no 5th) chord (A favorite substitution of mine for a major chord).

A Maj 7 # 11 no 5th

.

Here’s an mp3 of this chord.

.

Shortcut:

If you flat the top two notes of a major barre chord with the fifth and root on the B and high E string – you get a pretty hip major chord substitution.  This works in any key.

In part 2 of this series, I’ll look at sharping the 5th and the root to generate more chord voicings, combining both approaches and extrapolating lead ideas from these approaches as well.

Thanks for reading!!

-SC

Getting Through The Gig – Negotiating A Chord Chart Part 3

I took the wrong weekend to sleep in!  Guitar Squid distributed a link to part one of the post and by the time I got to check my stats for the weekend I had already missed my record keeping days.

However, you got here – welcome.

In the previous posts (part 1 and part 2), I talked about deciphering chord symbols and developing shortcuts for playing them.  In this post I’m going to talk about my approach and  how I ended up reading the chart.

.

One final time – here’s the 232 chart with upper extension triads written in:

.

Full Triadic Substitutions / Shortcuts

Here’s an mp3 of the track.  This was recorded with an FnH Ultrasonic recorded directly into AU Lab with PodFarm 2.0 @ 44.1.  The goal was an ambient wash of sound but in retrospect, I should have gone with a longer delay time/wetter reverb to hold the sustain.

Here’s the PodFarm Patch:

Here’s Bar 1 of the chart:

232 Measure 1

Notes:

  • Simple is better.  I usually start with 3-4 note voicings and then add from there on subsequent passes.
  • I chose the F minor chord in the first position to make the C in the chart the top note of the voicing (and thus accent the melody) – this kept my initial focus on voicings primarily on the D, G and B strings.
  • I added the bass note on the E and A strings so I could get a little more of the chord texture.
  • On the B minor 11 chord, I made some alterations on the fly.  To get the melody note on top of the voicing I doubled the 11 (E on the 5th fret).  Technically this isn’t a minor 11 chord as there’s no 3rd – but in this case Chris was playing the full voicing anyway, so I’m just adding texture.  Depending on what the bass was doing on the second pass I would probably add the 3rd of the chord (D) on the 5th fret of the A string.
  • The 3rd and 4th chords follow a similar pattern so I used the same voicing.
  • I decided to drop down to 1st position for the last chord to get some low-end emphasis.  I’d probably add some harp harmonics as well.
  • The same voicings and approach are used in Bar 2.

.

Bar 2

232 Measure 2

Bars 3-4


232 Measures 3-4

Notes:

  • A 9 (sus4) – This went to g,b and e strings to facilitate the melody note.  With the kind of ambient swell sounds that I used – muting the strings with the pick hand between chord changes becomes important to maintain smooth delay.
  • Bb Maj 9 – Here I was actually thinking Dm 7/Bb.  So I’m just using the top notes of the voicing.
  • E min 9 – This is a stock A string minor 9 voicing I use.  I have a couple of these for E and A strings I throw in when I need to.
  • F#9 (sus 4) – E maj/F# voicing based off of a VII position E barre chord.
  • G maj 9  – I was thinking B min but then added the A on the 10th fret for the melody and the G on the A string for the root.
  • C#min 9 – I moved the melody up an octave on the last 3 chords to amp up the arrangement.  Stock E string rooted voicing.  Sometimes I’d play the B on the D string and sometimes not.
  • D Maj 9 – Variation on the C#min9 shape – 2 useful voicings to have at your disposal.
  • E9 sus 4 – Just kept the D Maj 9 voicing, added the F# on the top string and played the low octave E.  I addition to filling out the chord the voicing puts me in a good spot space wise if we decide to repeat bars 1-4.

.

This has been a long series of instruction for a pretty simple chord chart, but the purpose of it was to detail the process behind those short cuts.  It might seem long and involved – but it gets easier over time.  In reality – the voicings took about a minute to suss out.

.

I hope this helps!  Please feel free to reply here or send an email to guitar.blueprint@gmail.com with any other questions you might have about this.

-SC