SooperLooper Live Looping AU Update 1.6.18 Announced

In the better late than never category, SooperLooper snuck out a new update last week (v1.6.18).  SooperLooper is an awesome FREE software version of the Gibson Echoplex EDP.

.

.You can download it here.

.

From the website:

SooperLooper is a live looping sampler capable of immediate loop recording, overdubbing, multiplying, reversing and more. It allows for multiple simultaneous multi-channel loops limited only by your computer’s available memory.

The application is a standalone JACK client with an engine controllable via OSC and MIDI. It also includes a GUI which communicates with the engine via OSC (even over a network) for user-friendly control on a desktop. However, this kind of live performance looping tool is most effectively used via hardware (midi footpedals, etc) and the engine can be run standalone on a computer without a monitor.

SooperLooper is currently supported on Linux and Mac OS X, and any other platforms that support JACK. The Mac OS X package is usable with at least the 0.6 release of JACK OS X. Note that for OS X Tiger, you’ll need to get at least version 0.7 of JACK-OSX.

A Mac OS X Audio Unit version is included which does not require JACK to run.”

.

This is a critical component of my live laptop rig.  It offers unparalleled opportunities for live sonic mangling.   If you have a mac (or run Linux) you should stop whatever you’re doing and download it now!

(Then if you keep it – please throw Jesse (the developer) some money for the tip jar.  He’s put a lot of work into it!)

.

Thanks for reading!

-SC

.

P.S. If you like this post you may also like:

HARDWARE VS. SOFTWARE – OR PRAISES AND PERILS IN LIVE LAPTOP USE

RECABINET 3 ANNOUNCED – NEW IRS AND A NEW AU/RTAS/VST SHELL

X CODE 3.2.5 / AU LAB 2.2 NOW AVAILABLE – CAVEAT EMPTOR

POD HD VS POD FARM: A COST COMPARISON

APOGEE DUET BREAK OUT BOX OVERVIEW

.

AU LAB/POD FARM 2.0/LIVE LAPTOP RIG TUTORIAL PART 6 – DUAL RIG DISTORTED TONES

LAPTOP GUITAR SETUP OR NOTES FROM A LIVE SHOW

.

AU LAB/POD FARM 2.0/LIVE LAPTOP RIG TUTORIAL PART 5

AU LAB/POD FARM 2.0/LIVE LAPTOP RIG TUTORIAL PART 4

AU LAB/POD FARM 2.0/LIVE LAPTOP RIG TUTORIAL PART 3

AU LAB/POD FARM 2.0/LIVE LAPTOP RIG TUTORIAL PART 2

AU LAB/POD FARM 2.0/LIVE LAPTOP RIG TUTORIAL PART 1

SETTING UP “TESTING ENVIRONMENTS” OR MULTI LAYERED TONES IN AU LAB

.

BUILDING BLOCKS – OR MORE EXAMINATIONS OF A LAPTOP GUITAR SETUP

A QUICK LICK – AND A RIG DU JOUR UPDATE FROM HO CHI MINH CITY

TECH LIMBO (NEITHER HEAVEN NOR HELL R.I.P. RONNIE JAMES DIO)

.

Keeping Your Ego Out Of The Song’s Way

Thanks for coming to this page but it’s moved!

You can find it now on Guitagrip.com.

Thanks for dropping by.  I hope to see you at guit-a-grip!

Hardware vs. Software – Or Praises And Perils In Live Laptop Use

Before I drag this article kicking and screaming down the bloody cobblestones of memory lane, I’ll mention that the kick off for this post was a recent effort to stabilize my laptop rig.

.

A couple of months ago I found out that the 4 gig chip that my laptop would support had come down in price.  This would allow me to max out my elder laptop at 6 gigs instead of the current 4.  I surmised that had to improve performance overall.

After saving up some cash – I ordered the chip from OWC.  It came very quickly and installation was a snap.  I turned on the laptop and seeing the memory say 6GB – was thrilled for about a ½ hour.

.

At that point, the laptop screen did a big wipe down and I got an error message of death – you need to shut off your laptop, which I did.  It powered back up and 10 minutes later did the same thing.  I took out the memory and added the old memory back and everything worked fine.  I contacted OWC – they had me try a few things, and then sent me an RMA so I could send it back for free.  The promptly sent me another chip.

.

I got that chip in the mail on Monday.  I installed it in my laptop and everything was fine.  I ran it all day and there were no issues.  I got it home and was streaming a video while I was working out and sure enough about an hour in the laptop screen did a big wipe down and I got an error message of death – you need to shut off your laptop, which I did.  This time however, when I turned off the laptop, I felt underneath it – I had the laptop elevated to get it some air to help cool it down, but even so – it was still hot enough that you could fry an egg on it.  I set the laptop on its side to cool it down and once the back was cool to the touch – maybe a couple of minutes later – started it up and it’s been working fine ever since.  I think it was the combination of the poor airflow and table lamps I have to increase the lighting. I’ll have to go to staples now and get one of those self cooling USB fan jobs and hope it doesn’t mess with the audio signal.  But it was an important reminder about the precarious nature of laptops as signal processors.   The reason I was trying this in advance was because at the next gig I have, I don’t want the laptop to shut down mid song and leave me stranded.

All of this got me rethinking the laptop vs hardware debate that I partially discussed here but is worth a broader examination.

.

The obligatory history lesson to stave off initial pointed questions of, “Do you even know what that stuff is supposed to sound like?”

As with many of the things I do, my entry into laptop guitar was completely unplanned, but in retrospect not that surprising.

When I first started playing guitar, the amp I had was a no frills, no name combo amp with a 12” speaker.  Given my influences at the time (Hendrix, Sabbath, Ozzy, etc.), it’s no surprise that almost immediately I started looking for distortion.  Then every dollar I could put together was going for other effects: wahs…chorus….delays… anything I could get my hand on to try to replicate those sounds.

When I was playing in the Committee of Public Safety (my avant-garde core French Revolution fixated band with voice, guitar, bass, cello and drums) – my signal chain was really small.  I had a Marshall JCM800 50 watt combo amp with a single 12 (this was run through a 4×12 Marshall 1960A cab).  I had a channel switcher for the amp, a volume pedal and a TC Distortion/Boost pedal.  The committee lead tone was the TC preamp before the Marshall distortion channel – and it was a creamy tone.  I want to say there was some kind of cheap delay in there as well (maybe an Arion), and from what I remember  that was it.

The Marshall got stolen from a rehearsal space in Allston while I was trying to resurrect mach 2 of the Committee.  The stolen amp was my cue from the universe that it was time to move onto another project.  In the meantime, something interesting started happening.  The more I got into pedals, the more I started getting into sounds that didn’t sound like the tones I was initially trying to emulate.  Soon the more a pedal disguised the fact that I was playing a guitar, the more I wanted that pedal.

At the time, I was working at a music store and an Ampeg guitar amp came in, and I got it for a super low price.  I started picking up some EH pedals at the time as well (including a really sweet 1st generation Russian Big Muff Pi), and I found an old tube echoplex.  I remember playing a gig and the sound man took a look at my pedals and said, “Wow – this would be a state of the art rig in like ’72.”  It was meant as a dig, but I took it as a compliment.  The rig had character, the tones were right there and it sounded as guitaristic (or non guitaristic) as I wanted it to.  That amp eventually gave way to amps by Seymour Duncan and Gibson before settling on a 4×10 Hot Rod DeVille (really a pretty great sounding amp with some mods by Tom at AzTech Electronics).

In between a lot of other pedals and effects crossed my path. This included a 1st generation Jam Man (with additional memory slotted in which really turned my head around) and eventually sold, a Rhythm and Sound (also sold), various distortions wahs and other filters.   By the time I was playing in Visible Inc (and later in The Bentmen/Tubtime/One Of Us) – my full rig was a tuner, Ernie Ball Volume Pedal, Digitech Space Station, T.C. Electronics Chorus, Memory Man Delay (original), Guyatone MD-2 delay, Akai Headrush looper, Vox Wah and another Ernie Ball volume pedal that went into the front end of a Fender Hot Rod Deville (4×10 amp).   The full rig sat in an 88 key keyboard flight case that would not fit width wise across my car seats.

During all of this, I was constantly investigating different digital options.  I had the original zoom effect that I used for quite a while, and when the line 6 came out – I remember getting a used 2.0 bean and just being blown away at the flexibility of it.  Even later – my B-rig (and the one I used primarily with Annette Farrington) was the pod bean with a line 6 pedal board, the looper, wah and volume pedal.  (Later in a cover band – it was only the Pod 2.0 in front of the amp). And that rig sounded pretty damn good in front of my amp.  Even the band’s sound guy went from dismissive to begrudging concession.  It really didn’t sound AS good as the full board – it sounded different – but it worked and it was a hell of a lot less stuff to bring than a huge pedal board.

This is all mentioned because about a month before I left Boston to go to CalArts, my rig was stolen out of an uninsured rehearsal space.  The only thing I had taken home with me was the space station and the Akai Headrush – the amp and all the rest of the pedals were gone.  The band hadn’t been rehearsing for a while so I had no idea anything was missing until a month later.  By then there wasn’t much of anything to do – but leave Boston and start what would now be my acoustic studies at CalArts.

My first year at CalArts, my wife got me a Pod XT for a Christmas gift – and that was my ticket back on the crazy train of gear.  But back when I was rocking a G3 ibook – I remember thinking that someday I’d be able to get guitar tones from a laptop.  The day would come that I’d be able to bring a guitar and a laptop and leave all those pedals behind.  And now I can say – that day is partially here.

Computer guitar tones are the best they’ve ever been, but there are a number of issues big and small that I think need to be acknowledged.

1.        Laptops do not sound like tube amps.  They just don’t.  Even running a laptop with a Marshall patch through a tube amp – doesn’t sound like a Marshall.   Having said that,  it doesn’t sound bad.  In fact, it sounds pretty damn good.  What laptops have all over traditional amps and pedals is flexibility and portability.  Knowing that I can bring a laptop and a guitar and (if the venue has a PA) get through a live show makes touring a LOT easier for me.

2.       Pedals don’t often break – but when they do – they can be bypassed and the amp still used.  The downside is that when the laptop goes down – you’re done.  I’ve never ever had a hardware POD breakdown at a show (other than one time when the venue lost stage power and ALL the amps (and PA) lost power.  I have had laptop programs crash mid set and it’s very nerve-wracking in a live context in the best situations.  In the worst situation – the show’s over.

Laptops are fragile and pedals are built for durability.  I don’t have to worry a well-built pedal getting ruined at a show (unless someone pours their beer on it) – but any one of a number of things could be the end of my laptop.

3.  The technological barrier to true emulation will be cracked.  The news of the new Thunderbolt protocol in mac books is stunning to me.  12x faster than firewire 800?  At a certain point the algorithms will be improved enough, the data transfer rate and processing power will be so high – that you will no longer be able to tell if something was recorded on tape or not.  You will no longer be able to tell if that’s a real tube amp you’re playing through.  It isn’t a question of if it will happen – only when – and honestly I think we’re only about 5-10 years away at the most.

4.  Emulation allows for sounds not feasible in the real world.  Do I want to get an idea of what running a guitar through 6 tube echoplexes sounds like?  Digitally? No Problem.  In the real world – you’d have to first find 6 working tube echoplex units – and the hiss would be unusable, trust me on that one.

If you’re planning on using a laptop live – here are some suggestions I have for you

1.  Optimize it.

  • From the get go, get the fastest processor, maximum memory and fastest hard drive you can afford initially. It doesn’t have to be the latest and greatest – it just needs to be relatively fast and expandable.  For my live looping rig I have a 2-year old Macbook Pro (2.4 gig Intel Core Duo) with 6 gigs of memory and an internal 7200 rpm drive.  I bought it with 2 gigs of ram and a 5400 rpm drive .  My initial upgrade was 4 gigs of memory and a 200 gig 7200 rpm drive as that’s what I could afford at the time.  The first time I looked at a 4 gig chip the cost was $150.  The one I just installed to get the machine to 6 gig was around $90.
  • As time goes on (and costs decrease) plan on upgrading when necessary.


  • Count on needing an external drive if you’re going to do any recording.


  • Defrag your drives – frequently. When I went from the 200 gig drive to the 500 gig drive I defragged it during the drive cloning and my system speed increase was about 30%.  It makes a big difference.

2.  Back it up.

The first time you lose all your data – you will know how important this is.  I’m especially bad at this as well and only back up once a week or so.  A hard drive is a very delicate thing.  If you knew you easily it lost information, you would lose sleep at night.

3.  Make Multiple patches and back them up as well.

Patches take up almost no drive space.  I probably have 40-50 different AU Lab settings.  The reason for this is that AU LAB remembers all of the patch parameters as you save them.  So if, for example, you finally optimize your work flow and settings and accidentally close the mixer window and save it when you close out  –  that window is gone when you reopen it – and there isn’t  a way to recall it.  What that leaves is no way to change parameters, levels etc.  In other words – you start from scratch.  I do this with POD FARM patches as well (multiple variants of tones so if I can call up parameters at will), SooperLooper, Apogee Maestro and FBV preferences as well.  Hugely helpful in sessions – believe me.

3.  Related to #2 and 3 – organize your folders and label them logically.

In working on my book, you would be amazed at the amount of time lost digging through folders with vague titles looking for old graphics.  All my patches are in one place and backed up to a flash drive.

4.  To the extent you can – run real world tests before going live.

If the stage has hot lights on it, it’s going to be doubly warm for your laptop – will it operate correctly in a live context.  In a related note, record yourself when you’re playing and check levels etc.  As I’ve said before, there’s a substantial difference in sounds that work when your practicing with headphones, sounds that work at low volumes and concert level sounds.  The more prepared you are, the easier it will be to keep it all together.

5.  Keep it compact

Typically in live performance you won’t have an hour to set stuff up.  5-10 minutes is optimal.  To the extent that you can, try to pre-cable all of your connections.  Don’t assume that the venue will have clean, continual power.  I have a surge protector built into my strip – it’s not ideal but it’s better than nothing.

6.  Go with the highest resolution your system will handle.

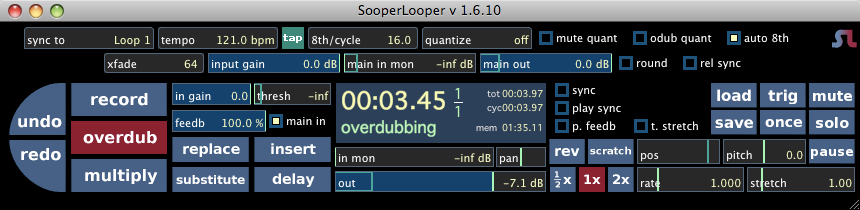
SooperLooper freaks out when I run anything higher than 44.1k – so if I’m looping – everything runs 44.1.  If I’m not looping everything runs 88.2, or 96k.  The clean sounds have more definition and the dirty sounds are a whole different ball game at 88.2 vs 44.1.  Again, this is where having multiple AU patches comes in handy.

7.  Be flexible.

Have a backup plan when things go wrong.  In a worse case scenario where the laptop completely fails – I can go directly into the amp and get a signal.  There won’t be any effects, but at least I don’t have to stop playing while it gets sussed out.

8.  Be calm.

This took a while for me to get my head around.  The problem with getting freaked out – is that it just exacerbates the situation as typically it leads to bad decisions which leads to more freaking out.  The more you can calmly assess what’s going wrong, the more quickly you’ll be able to solve the problem.

9.  Bring Extras.

I bring a trouble shooting pack to every gig it consists of:

  • duct tape – to tape down cables/or hold things together if need be.
  • a mag light – things get lost on stage very easily.
  • a small tool bag with screwdrivers, pliers and a wrench
  • a black magic marker and post its – in case I need to make any patch changes, write up set lists, etc
  • 9 volt batteries (for my ebow – also for my back up tuner)
  • strings and a string winder
  • back up usb and firewire cables
  • an extension cord
  • a flash drive with back up patches for everything

10.  Bring your A game.

Stage presence is a difficult thing to bring to a laptop performance, but to the extent that you can – show that you’re engaged (or at least don’t look bored/frightened) and come out from your laptop once in a while.  If it’s engaging for the audience, it’s going to make the performance go easier for you as well.

Thanks for reading!

-SC

New SooperLooper Update 1.6.16

For those of you who use SooperLooper – it looks like Jesse snuck a new release under the radar back in January that I’m just catching now.

The only release note is that the AU unit is now more stable under various hosts,  for those of you with AU validation issues – this might help out a lot.

For those of you who have a Mac and aren’t using SooperLooper – now’s the time to get on board.  SooperLooper is a shareware application that uses a lot of the functionality of the Oberheim/Gibson echoplex looping unit.  It’s leagues above the looper that you get with Mainstage and could be all you need to do a 1 person show.

(If  you do start using it – you should definitely send a couple of bucks Jesse’s way for all the hard work he’s done on it.)

-SC

Rough Hewn Trio – Some Live Excerpts

The Rough Hewn Trio –  an instrumental trio consisting of Chris Lavender on Warr guitar, Craig Bunch on drums and myself on guitar are getting back into the rehearsal cycle and gearing up for some shows this spring.  To get a feel for what the shows will be like here are some live excerpts from some improvisations we did this fall.  The live sets – will include a combination of pre-composed and improvised material.

For those of you who are interested – this session is all drums and laptops.  I’m running Pod Farm and Sooperlooper and Chris is using Guitar Rig. (an amp was used to re-amp the guitar in 1C – which had some gnarly digital distortion tho…)

Note:

mp3 playback is sometimes a little glitchy in Safari.  If it doesn’t play in your web browser – you may just have to reload/refresh the playback page.

Enjoy!

-SC

Improv 2b

Improv 2a

Improv 1c

Laptop Guitar Setup Or Notes From A Live Show

For the Onibaba show last night, I decided to use only the laptop rig that I’ve been working with and not use the typical Atomic/Pod X3 rig that I use.  The short of it is that from a technical standpoint – it worked without a hitch.  I don’t think that anyone noticed that there weren’t “real amps” there and tonally it fit the bill.  There were, however,  a few little quirks that needed to be sussed out.

1 The room we were playing in had very high ceilings and was really boomy.  Sounded great on acoustic instruments – but I had to be really careful of not getting washed out tone wise.

2 The midi assignments for Sooper Looper stopped working when I used the FBV express board.  The board worked fine – but I’ll probably just return it and get a breakout box instead.  The FBV Express can control about 6 functions – but ultimately I’d like to control about 10-12 functions – so I think it makes more sense to just trigger it manually.

.

No one size fits all

.

As I’ve mentioned here, there are a number of variances that occur with modeling:

“I’m in the process of working on sounds on the X3 Live for the show – and tweak PA vs. amp sounds.  One thing I’ve noticed with modeling is that there are at least 4 different scenarios for setting up sounds:

1.  Headphone patches – i.e. practicing or recording

2.  Playing through an amp at low volumes

3.  Playing through an amp at high volumes

4.  Playing through a PA.

You might think that there wasn’t a lot of variance – but the differences between these parameters are huge.  I have patches that sound mediocre at low volumes and sound really good when the volume gets goosed a bit.  Headphone patches that work well at home and fall apart live – and vice versa.”

So along this line  I knew I’d have to tweak some patches I’d been using  and make some new ones for the show.  I decided to pull some patches I liked and demo them at low volumes in my apartment and then try to fix anything glaringly wrong at the show.

.

Reverse Engineering or Start with the output

.

A while ago I mentioned I bought a back up Atomic amp from Guitar Center for $149.  The listing was for an Atomic Reactor 1×12 – but both the 50 watt and the 18 Watt are 1×12 – so what I got in the mail was the 18 watt.  Initially, I was a little disappointed – but given that you can run it on 115V OR 240V – I figured it was a good investment and that in a worse case scenario I could sell it and make my money back.

When I set up my sounds – I set them up on the 18w.  There’s no master volume knob – it just runs at 18 watts – but I could control the output with my duet and set things up at a low volume.

The Atomics in general are very bass heavy so I knew from the get go I’d have to roll a lot of the bass down and tweak other mid and high levels.

AfterI got a tone set up on a lark I decided to try to run it stereo.  I pulled out the 50 watt Atomic and there were some weird grounding issues.  While I was trying to suss that out I decided to A/B the amps – and see if there was a difference.  Suprisingly  the 18 Watt sounded MUCH better than the 50 watt.  The 18 watt does use different tubes (2 EL34’s and 1 12ax7a as opposed to the 6l6GCs and the 12AX7 in the 50 watt) – but I think that just having the amp full bore made a big difference.  The more I cranked the output volume on the Duet – the more the tone sagged in a very pleasing way.  Also the 18 watt is DEAD quiet so that solved the issue of the loud fan on the 50 watt version.  I knew the 18 Watt was loud but I wasn’t sure if it was fully going to be able to hang with drums, bass, amplified trombone and the awesome sonic terror of Vinny Golia – but it did.

.

IMPORTANT DUET NOTE: 

When setting output volume on the unit – if you choose “Instrument amp” – you get a flat volume that you are unable to control – by setting it to “Line Level” you can adjust the output with the knob on the Duet.

.

I think the Duet output went to ten – I never went higher than 5 – and at one point turned down to 3.  18 Watts was more than enough for the gig.  The drag now is I like the amp enough to sink more money into it and have I have the desire to get the amp re-tolexed.  Maybe with like a fender tweed or something.  In the meantime I used the 18 watter as a low volume template and could then tweak it further in the space as I needed to.

.

Organization is key

.

One reason to go digital is the rigs themselves they take up so little disk space you could save hundreds of them and have individual configurations for almost any situation.  This is also one reason NOT to go digital as it’s easy to get overwhelmed with options instead of narrowing it down to a few.

A great feature about POD Farm 2  is that you can create and organize folders with drag and drop ease.

For example let’s begin by looking at how I built my live setup:

First – here’s a sample patch:

.

Now if you look over to Setlists:

.

You’ll see I created a folder marked ATOMIC.

.

Tip:

If you want to control changing setlists from a Midi Controller – Just control click on the up or down arrow, in the Setlist window and then press the midi controller feature you want to use to control it

.

Within that setlist, I have a series of patches – I name them all Atomic – so I can find them easily if I have to.

.

Another Tip:

If you want to control changing Programs (i.e different patches) within a setlist  from a Midi Controller –  Go to the top of the screen – where the patch name is:

Just control click on the up or down arrow to the right of the Patch name, in the and then press the midi controller feature you want to use to control it.

I’ve set it up to be used withthe up and down arrows on the right of the shortboard.  I decided to have one  folder marked Atomic and then just scroll up and down through the folder to get to patches. You could just as easily set up multiple folders and organize patches (and if you have only 4 tones per Setlist – you could just A/B/C/D them with the shortboard and use the up and down arrows to go between setlists – just like the setup on the PODs).

When I used the pod X3 with the docking station in the Atomic – one feature I would use a lot was the dual rig feature with one rig with a speaker sim – and one with none – It gave the sound a lift in a pleasing way.  At the gig I just ran them all through the 4×12 IRs I’ve been using and it sounded fine – I may put the IRs on a bus and mix the two to see how it sounds – but this is the rig I’m using as of this post.

Clarity wise – I felt it had a noticeable advantage over the X3 – but I’ll have to do more experimenting.  In a future post – I’ll detail a Dual distortion tone I’ve been developing and discuss some more specifics with using a laptop as a guitar processor live.
.
Thanks for reading!
.
-SC

AU Lab/POD Farm 2.0/Live Laptop Rig Tutorial Part 4

Welcome back!  In this post, I’ll be integrating SooperLooper into the AU LAB Live rig I’ve been building.  If you haven’t read the earlier posts about this (part 1, part 2 or part 3) you may want to read those before continuing on.

An Important note about sample rates:

From here on out – if you’re going to be incorporating other audio into the session (including looping in SooperLooper) – you’re probably going to have to set the sample rate back to 44.1 (and set the Impulse responses back to 44.1).  If I’m not looping –  I try to set the rate as high as I can, but know that it’s going to have to get bounced down to 44.1 for recording, etc.

SooperLooper:

The next step is to set up Sooper Looper to be able to loop audio.  I’m going to put SooperLooper on a bus, so I can either send audio to it or bypass it as need be.

In AU LAB – – > Sends – Select BUS 1.

A new Bus Strip will open.

Under Effects – scroll down and select Sooper Looper.

When you do this, Sooper Looper will open up in 2 windows:

The first window:

And then the GUI

A Quick Tip:

When using sooperlooper, you need to increase the “main in mon” to hear any output.

You can set up multiple stereo loops in Sooper Looper by selecting them from the SooperLooper menu.

I like to have 4-5 different loops set up.

You could do more (your limits are your system resources- but since I’m on a laptop – I want to be able to see everything (and this takes up some screen space).

Another Quick Tip:

You can set SooperLooper up for midi controls but the key binding options will help you navigate the window pretty easily as well.  They’re found under SooperLooper Preferences.

For example – you need to select an audio loop in order to record to it.  If you look at the bindings above you’ll see that select_loop_1 is currently set to “1”.

So if you’re on the active SooperLooper window and hit 1 – you’ll arm track 1. (Note the new line to the far left of SooperLooper that shows which track is armed for recording)

Make sure to save your AU Lab session.

Setting up MIDI control in SooperLooper:

In the first SooperLooper window:

Click on the arrow next to essej.net: Sooper.

Select Midi Effect Editor

Set the MIDI Source to the controller you want to use and set the Midi Channel to the channel you want to use.

Note:

If you don’t see the controller then go to Audio-Midi Setup application (or you could find it in the Application – –  > Utilities folder) and click on the MIDI tab.

To Set up specific commands in Sooper Looper, you’ll need to go to Midi Bindings under SooperLooper Prefereces:

MIDI Binding Steps in SooperLooper:

Click “Add New”.

Select a command under “Command/Control”.

Click “Learn”.

Press the midi control you want to use to control the function.

Click “Modify”.

When you get all the functions learned  – click Save.

Also make sure you save bother you SooperLooper AND your AU LAB session.  All the midi functions should be there when you reopen it – but if they aren’t and you’ve saved them in Sooper Looper – you can just “Load” them back in.

AU Lab : Transport

Here’s something pretty cool – the Window tab in AU Lab – select Show Transport

That will bring up the following window:

The MIDI Clock Source will probably default to Disabled – If you set it to Internal – you can use to tap tempo feature to synch effects or Sooper Looper  by tempo.  Pretty cool feature!

(Also in the the Window tab in AU Lab there are some other useful options particularly –  Show CPU Load – which brings up a handy visual meter to let you see how your project is doing with it’s resources.)

Additional Resources: SooperLooper

SooperLooper is an incredibly deep plug in.  It would be easy to devote a 5 part article to just the feature set and use of it – The  Sooper Looper forum is also extremely helpful with various Sooper Looper issues, and also has a specific SooperLooper AU LAB section.

Next time – I complete the rig (for now)

You can find all of the laptop guitar rig posts on the Blueprints tab on the top of the page.  Once on the blueprints page – just scroll down to the Laptop Guitar Rig section.

Thanks for reading!


AU Lab/POD Farm 2.0/Live Laptop Rig Tutorial Part 3

Hello again.

If you haven’t read the first or the second posts about setting up POD Farm in AU Lab, you may want to review those first.

Automating Parameters with MIDI Learn:

Now let’s complete the clean guitar setup and then automate some parameters in POD Farm.

First I’m going to delete the delay and add a volume pedal.  You’ll find it under “Dynamics”.

It could just as easily go before the amp, but in this case I want to put it between the amp and the delay, so I’ve deleted the Analog delay and placed a Tube echo after the volume pedal.

Next I’ll add a wah.

And an overdrive pedal.  I’m going to have a full on distortion tone on the other channel – but this gives me another tonal option.

Across the Very top of the Pod Farm Window (labeled Audio 1: POD Farm 2 (1))

You’ll see 4 tabs underneath that window reading from left to right:

Audio1 –> POD Farm 2(1) –> Untitled –> Line:6 POD Farm 2

Select the arrow to the right of Line:6 POD Farm 2 and scroll down to Midi Effect Editor:

You’ll notice that the MIDI Source is None – which in this case means that the shortboard is getting power and sending midi, but it’s not being received by POD Farm/AU Lab.

I’ve selected the POD short board for the MIDI SOURCE, and will keep it on midi channel 1

POD Farm: Midi Learn – Volume

Now that the midi signal from the shortboard will get to POD Farm, I can use the Midi Learn function.

Let’s start with the volume pedal.

If I select the volume pedal in the signal chain a close up of the pedal will open up in the window above the signal chain.

Since I want to control the volume of the pedal  – I want to cntrl – click the level knob on the pedal.

That brings up the following option:

Choose MIDI Control – – > MIDI Learn.  Now if I move the volume pedal with my foot the level on the screen will change as well.

(If you make a mistake you can choose the “Clear” option above MIDI Learn and repeat the process.)

Note:

If you wanted to do this with a distorted amp and roll off the gain, you could select the amp and cntrl – click the Gain knob.  Even better, with the “Set min to current pos/Set max to current position” you could use the volume pedal for subtle variations in gain.

POD Farm: Midi Learn – Volume

Let’s see how this works with the Wah pedal.

First, as opposed to the volume pedal, which is always on, I want to be able to turn the wah pedal on and off.

The “secret” here is to automate the On/Off button under the “Gate” Button.

By selecting the MIDI Learn function and pressing down on the toe switch, that switch now turns the pedal on and off.

Next, with the toe switch on – I’m going to set the volume pedal to control the WAH sweep.  Just cntrl-click the actual wah switch for MIDI Learn and move the pedal.  The pedal will now control the sweep.

I like the Chrome Custom pedal, but don’t like the extreme high end, so I’m going to limit the scope of the sweep.  I’m going to turn the knob to 85% or so and then cntrl- click, but this time instead of selecting MIDI Learn, I’m going to choose “Set max to current position”.

Now when I sweep the wah it only goes from 0-85%.  This is really useful if you only want to filter a specific bandwidth.

I’ll set the Overdrive to an on off setting – the same way that I did with the wah.

That is enough for a general clean tone.  Now onto…

The Dirty Channel:

I’m going to spend a lot less time on this as I’ve already shown how to set up and automate effects on the clean side.

Here’s the default set up:

A brief note on tone:

In distorted models, you can create amps with gain structures that you could never create feasibly in the real world.  One problem I hear a lot is the desire to crank the gain and cut all the mids.  That creates a particular sound – but it’s not one that cuts through very easily.  The overdrive will boost the channel a bit in general, but it’s easier to ADD distortion live than it is to take it away.  Again, louder isn’t always better.

Basically I’m using the same Volume, Wah and delay as the clean channel above.  The only differences are in the amp and overdrive pedal (and that I’ve moved the placement of the volume pedal.)

Here’s the overdrive setttings:

POD Farm: Midi Learn – A/B Switch

The next step is to set up a midi command to be able to switch from the A to B channel.

The secret here is to click on the mixer button so the A/B Box appears in the window above the rig.

All I have to do then is cntrl-click the A/B button and select a button on the shortboard and then it’s all set.

Save your Bacon:

Hopefully you’ve saved your POD Farm patch and your AU Lab settings, but if not saving them both are very self explanatory.

Let’s start with POD Farm:

Click to the left of Default and save as

In this stage, you can also make whatever notes you want as well for later reference which is a nice feature.

Another really cool thing about AU Lab is that when you save AU lab – it saves the settings on all of the effects in AU Lab.  So save OFTEN.

That’s it for this post.  In the next post, I’ll add Sooperlooper into the rig.

You can find all of the laptop guitar rig posts on the Blueprints tab on the top of the page.  Once on the blueprints page – just scroll down to the Laptop Guitar Rig section.

Thanks for reading!

AU Lab/POD Farm 2.0/Live Laptop Rig Tutorial Part 2

In the previous post, an AU Lab session (or document) was established and an A/B POD Farm patch was created.  In this post, I’m going to start modifying the patch to make it more useable.

Building the rig:

Okay first I’m going to swap out the amp. I like the Double Verb instead.

You can drag and drop amps into the signal chain, but if I click on the down arrow to the right of the AMP field – I can just scroll down to the Double Verb amp.

Here are the settings I’m using.

If you look in the left hand corner underneath the input knob on POD Farm, you’ll notice the global gate is on.  I tend to use the global gate at a low setting.  This came from a ruined session where I switched to a distorted sound that DIDN’T have a gate on it and squealed between each phrase.  Now I keep the master gate on to not worry about that scenario.

Compression:

Louder isn’t always better.

Compression has it’s place – but I try to play dynamically, so the compression is the first thing to leave the POD farm signal chain.

If you click on the compressor in the signal chain and then ctrl-click on the compressor you’ll get the following options.

Just select Delete.  If you change your mind you can drag and drop another compressor from the menu into the signal chain.

Another point to bring up, is that when I use an amp and effects – I try to use the same signal chain for all of them.  (This comes from years of playing gigs and having a bunch of effects pedals going through the same amp and reverb).

Looking at this set up, the mic pre (currently between the amp and the reverb) would be something that I would want in the channel signal chain in AU LAB instead of POD Farm – so that it was the same mic pre for any amp I’m using.

The first step is to delete the mic-pre from the POD Farm signal chain (using the same method as the compressor above).

Next (in AU LAB) in the Audio 1 channel – click on the arrow in the next available Effects field below PODfarm .

If you scroll down to Line 6, you’ll see that in addition to PODFarm, that each individual component of a PODfarm rig has been broken down into components (aka POD Elements).  This is so you can use individual effects or amps as an AU plug in which much less of a CPU hit than loading in another instance of POD Farm.

In this case choose: POD Farm Element – Preamp.  I’ve chosen Vintage UK.

Reverb:

The reverb would also be something that I would want in the channel signal chain – so that it was the same reverb for any amp I’m using.  (The other advantage is that by placing the reverb outside of POD Farm, when I change amp settings the reverb doesn’t cut off with the amp change.)

Delete the Reverb from the signal chain in POD Farm (using the same method as the compressor and the mic-pre above).

Next, (in AU LAB) in the Audio 1 channel – click on the arrow in the next available Effects field below POD Farm Element – Preamp.

If you scroll down to Line 6, choose: POD Farm Elements – Reverbs.  I’ve chosen Standard Spring.  Here are the settings I’m using.

Impulse Responses:

I use impulse responses rather than the speaker sims in Pod farm.  So the next thing I’m going to do is get rid of the speaker cabinet/microphone on Podfarm.  If I click on the CAB button – I’ll get a list of speaker cabinets and microphones used.  If I scroll to the top of the list – I’ll get “No Cabinet” which deactivates both the cabinet and the microphone.

Next, (in AU LAB) in the Audio 1 channel – click on the arrow in the next available Effects field belowPOD Farm Element – Reverbs.

Scroll down to Lernvall Audio and select LA Convolver.

Now I’m going to select to impulse responses to act as a speaker simulator.  I’ve experimented with putting multiple instances of LAConvolver  on buses and running multiple cabs, but since I want to run SooperLooper in the bus (Where I can loop guitar and any other incoming audio source), I’m going to just stick with a stereo set.

Select a channel and hit “choose” under file. In this case I’m using the free RedWirez cabinet I got as part of their birthday giveaway.

I want to use a high sample rate to get better definition so I’ve chosen 88.2 K. (or 2 times 44.1k)

I’ve chosen an SM57 on the grill and a KM84 about 3 inches behind the back of the amp.  I tend to start with the Wet gain in the center position and adjust as necessary.

A brief note:

I’ve mentioned this in other posts, but since I want to use the same speaker cab for all the amplifiers, I’m going with a 4×12 for familiarity.  Normally,  I wouldn’t match a double verb up with a 4×12, but since I’m going to be running a Marshall on the other channel, I’m going to just have to adjust the clean amp signals accordingly.

Fixing the Sample Rate:

If you notice, the plug in sample rate and the Impulse response sample rates are different.  It will work like this – but I want to use the highest sample rate I can for the most clarity.  There is a delicate balancing act that comes between high sample rates, stability and useable latency, so everything here is a compromise.

I’ll fix this with Audio Midi Set up :

First: click on AU Lab and look under Preferences.

When the preferences window opens, click on the tab marked Devices.

If you click on the expert setting arrow you’ll see something like the following:

Another  brief note:

I’ve set the CPU to 100% to avoid glitches.  I’ve also set the latency really high to attempt to keep the system stable.  Depending on the system and interface that you’re using, you’ll probably have to lower the setting to the point that you get glitching (or max out the memory) and then bring it up a little bit from there.  With the headphone out of the Duet – even with these settings the latency is suprisingly tolerable.

If I click Edit Device – that opens up the Audio-Midi Setup application (or you could find it in the Application – –  > Utilities folder)

Note:  I’ve changed the output format to 88.2.

Going back to the Audio-midi sample rate window – it shows:

An Important note about sample rates:

I’ll mention this again – but if you’re going to be incorporating other audio into the session (including looping in SooperLooper) – you’re probably going to have to set the sample rate back to 44.1 (and set the Impulse responses back to 44.1).  If I’m not looping –  I try to set the rate as high as I can, but know that it’s going to have to get bounced down to 44.1 for recording, etc.

While I’m on the preferences Tab I might as well set up recording to the external drive.  Click on the tab marked “Recording”.

Now if I click on the “Rec” button at the bottom of OUTPUT 1 in AU LAB, it will record whatever I do to the Lacie as the default location, in a 24 Bit AIFF format.

With the changes in this part of the tutorial, the AU Lab Input looks like this with some sample input:

You’ll notice that the output is a little off balance.

If you pan it to the left you’ll balance the signal out a little more. Here’s the setting with all the global FX so far.

You may want to save the AU LAB session now, if you haven’t done so already.

In the next session, I’m going to complete the clean channel effects and automate some parameters with the Midi Learn function to be able to make changes to the sounds with the Line 6 Shortboard.

You can find all of the laptop guitar rig posts on the Blueprints tab on the top of the page.  Once on the blueprints page – just scroll down to the Laptop Guitar Rig section.

Thanks for reading!

AU Lab/POD Farm 2.0/Live Laptop Rig Tutorial part 1

I’ve received a couple of pm’s regarding AU lab and setting it up for live use (largely from this post).  With an upcoming film accompaniment and a need to re-tool the setup a little I thought I would build a rig from scratch and explain how I’m doing everything.

About this tutorial:

What I am doing here is documenting the specific process for building a working rig for myself.  If you don’t have this specific hardware/software set up, you could adapt the process to whatever you’re using.

AU LAB

First a bit about AU Lab.  If you have a Mac Laptop with an OSX operating system, you have access to one of the greatest FREE music applications imaginable.  AU Lab is a program that was designed for AU (Audio Unit – The Mac proprietary plug in standard – much in concept like a VST) developers to test plug ins – but since it can accept audio and midi, has buses and can record audio – this makes it a great tool.  The fact that it does it with a fraction of the CPU of something like Logic makes it essential.

AU Lab can be installed as part of the SDK package that is on your OSX install discs.  If for whatever reason you can’t find your discs – you can go to the Apple Developer site and sign up for a free account.  You can then download the SDK package.  Once it’s installed it should be in folder called “Developer” but if you just search for “AU Lab” on your computer it will come up.

3/10/11 NOTE:

The UA LAB Version used in all of these examples is AU LAB Version 2.1.  Version 2.2 has not been stable on my system with the Apogee Duet.  You can read about the current version here – but in the meantime – you may want to download X code 3.2.2 Developer’s Tools – which has version 2.1 of AU Lab, if it isn’t installed on your system already.

Before getting into the setup – here are the tools I’m using for this particular rig:

Hardware:

FNH custom guitar:  You can find a full review of this guitar here.

Macbook Pro- 2.4 Ghz Intel Core 2 Duo.  This is actually a 2008 version I got with a killer educational discount.  15” with firewire 400 and 800.  This Macbook has had 4 gigs of memory that I got from OWC (although the first slot can take 6 gigs so I’ll probably upgrade that before the end of the year) and a  Seagate 500 gig 7200 rpm drive.  I underestimated just how important the internal drive was to performance but it made a very big difference.

Lacie Rugged Drive – This is the 320 gig bus powered version.  Also 7200 rpm.  I run it on the firewire 800 port and use it to record to.  It’s a little overkill – but I can use it for larger sessions as well.

Apogee Duet – Firewire interface.  No other A/D converter near this quality in this price range –  No question about it.

Line 6 FBV shortboard Mark II – Line 6 got it 100% right with this product.  Smaller than the old shortboard, but can be USB powered.

Ilok key – This is required for the Ilok version of POD Farm.

Korg nanokey – The keyboard for this is a little toylike – but I’m not a keybaordist.  It is velocity sensitive and kits in a laptop bag – and I can use it to trigger patches, samples, etc.  I think all the Korg nano products are really cool.  Very useful item.

Apiotek USB 2.0 Quad – This is an express card adaptor that opens up 4 usb slots on the computer.  Since the Macbook only has 2 USB ports and I have at least 3 usb devices – this is REALLY helpful.

Software:

I’m not going to go into any real depth on the software – As I’ve already covered it in other posts.  (Look under LAPTOP GUITAR RIG)

AU Lab

POD Farm 2 Platinum (And POD Farm Elements)

La Convolver

RedWirez

SooperLooper

Absynth

Optional Software:

If using this hardware you will probably have to use one or all of these at some point.

Audio Midi Setup (Mac application – part of the OS install)

Apogee Maestro (Comes with the Duet)

Line 6 FBV Control (Free download from Line 6)

This will be a VERY indepth tutorial – but I want to make sure I cover everything I can.

AU LAB Set up

Go ahead and launch AU Lab

You’ll come to a screen that looks like this:

I want to run a stereo channel out so this is fine.

Click Next.

Notice that the default setting has no input – you can change this later – but it helps to set it up now.

Click Add Input.

Now you have an input source.

Click Next

In this case I’m using the Duet – so it came up as the default in the Audio Device field.  If you’re not seeing the audio device you want to use open Audio Midi Setup (in the Applications – –  > Utilities folder) and make sure you see it there.

You can check the input channels if you’d like:

This shows that the Left/Right 1/4” ins are both available.  I’ll only be using Instrument 1 for the guitar – but I could run another instrument if I wanted to.

Click Done:

Here’s the screen that you’ll get.  If you have your guitar plugged in and strum a chord – you should hear it.  But this is going to get a lot better.

POD Farm set up

The first step is to set up PodFarm:  Click on The Effects tab in Audio 1 and scroll down until you get to Podfarm 2.

Here is the default screen in Pod Farm:

What I’m going to do here is set up a clean and distorted channel that I can switch back and forth between and automate some of the parameters so I can change them with my shortboard.

The First thing to do is get the input sorted out – since I’ve selected a stereo input in AUlab – the default in Pod farm will be a stereo in.

I only need  the left channel in as I’m only using 1 guitar for right now.

If I click on the arrow to the right of input: Stereo and scroll down to left – I now have the Instrument 1 Input on the Duet (left) as the input for this channel.

Before setting everything up – I’ll take a second to get in tune:

If I click on the tuning fork to the right of the Line 6 logo – that opens the Tuner.

If I click on the tuning fork to the right of the Line 6 logo – that opens the Tuner.

The next step is to create a Dual Tone.   In this case I’ll just copy the current tone.

Click the dual button and select Copy Tone.

And you’ll get this:

Note that the input has stayed the same as well.  Now my single guitar input can be used on both channels.

In general, I haven’t had a lot of success with 2 channel sounds – particularly distortion – which tends to overload in unpredictable ways.  I’ve clicked on the A+B Switch to turn it off.

A brief note:

The first time I did this – the guitar tone was digitally distorting (unpleasantly) so I brought the output of PodFarm down and it was still an issue.  Once I opened Apogee Maestro – the utility that came with the Apogee Duet – I realized that the signal coming out of the Duet was too hot.

It’s important to realize that the more items you add, the more things you’ll have to check when it goes wrong.

You may want to save the AU LAB session and save the POD Farm patch as well.    AU Lab saves all the settings of all the effects in the session, but you need to save the patch in POD Farm to load it again.

In future sessions, I’m going to create an A/B rig with a dirty and clean guitar amps and use the midi learn functions to change effects with the Line 6 Shortboard.

You can find all of the laptop guitar rig posts on the Blueprints tab on the top of the page.  Once on the blueprints page – just scroll down to the Laptop Guitar Rig section. 

Thanks for reading!